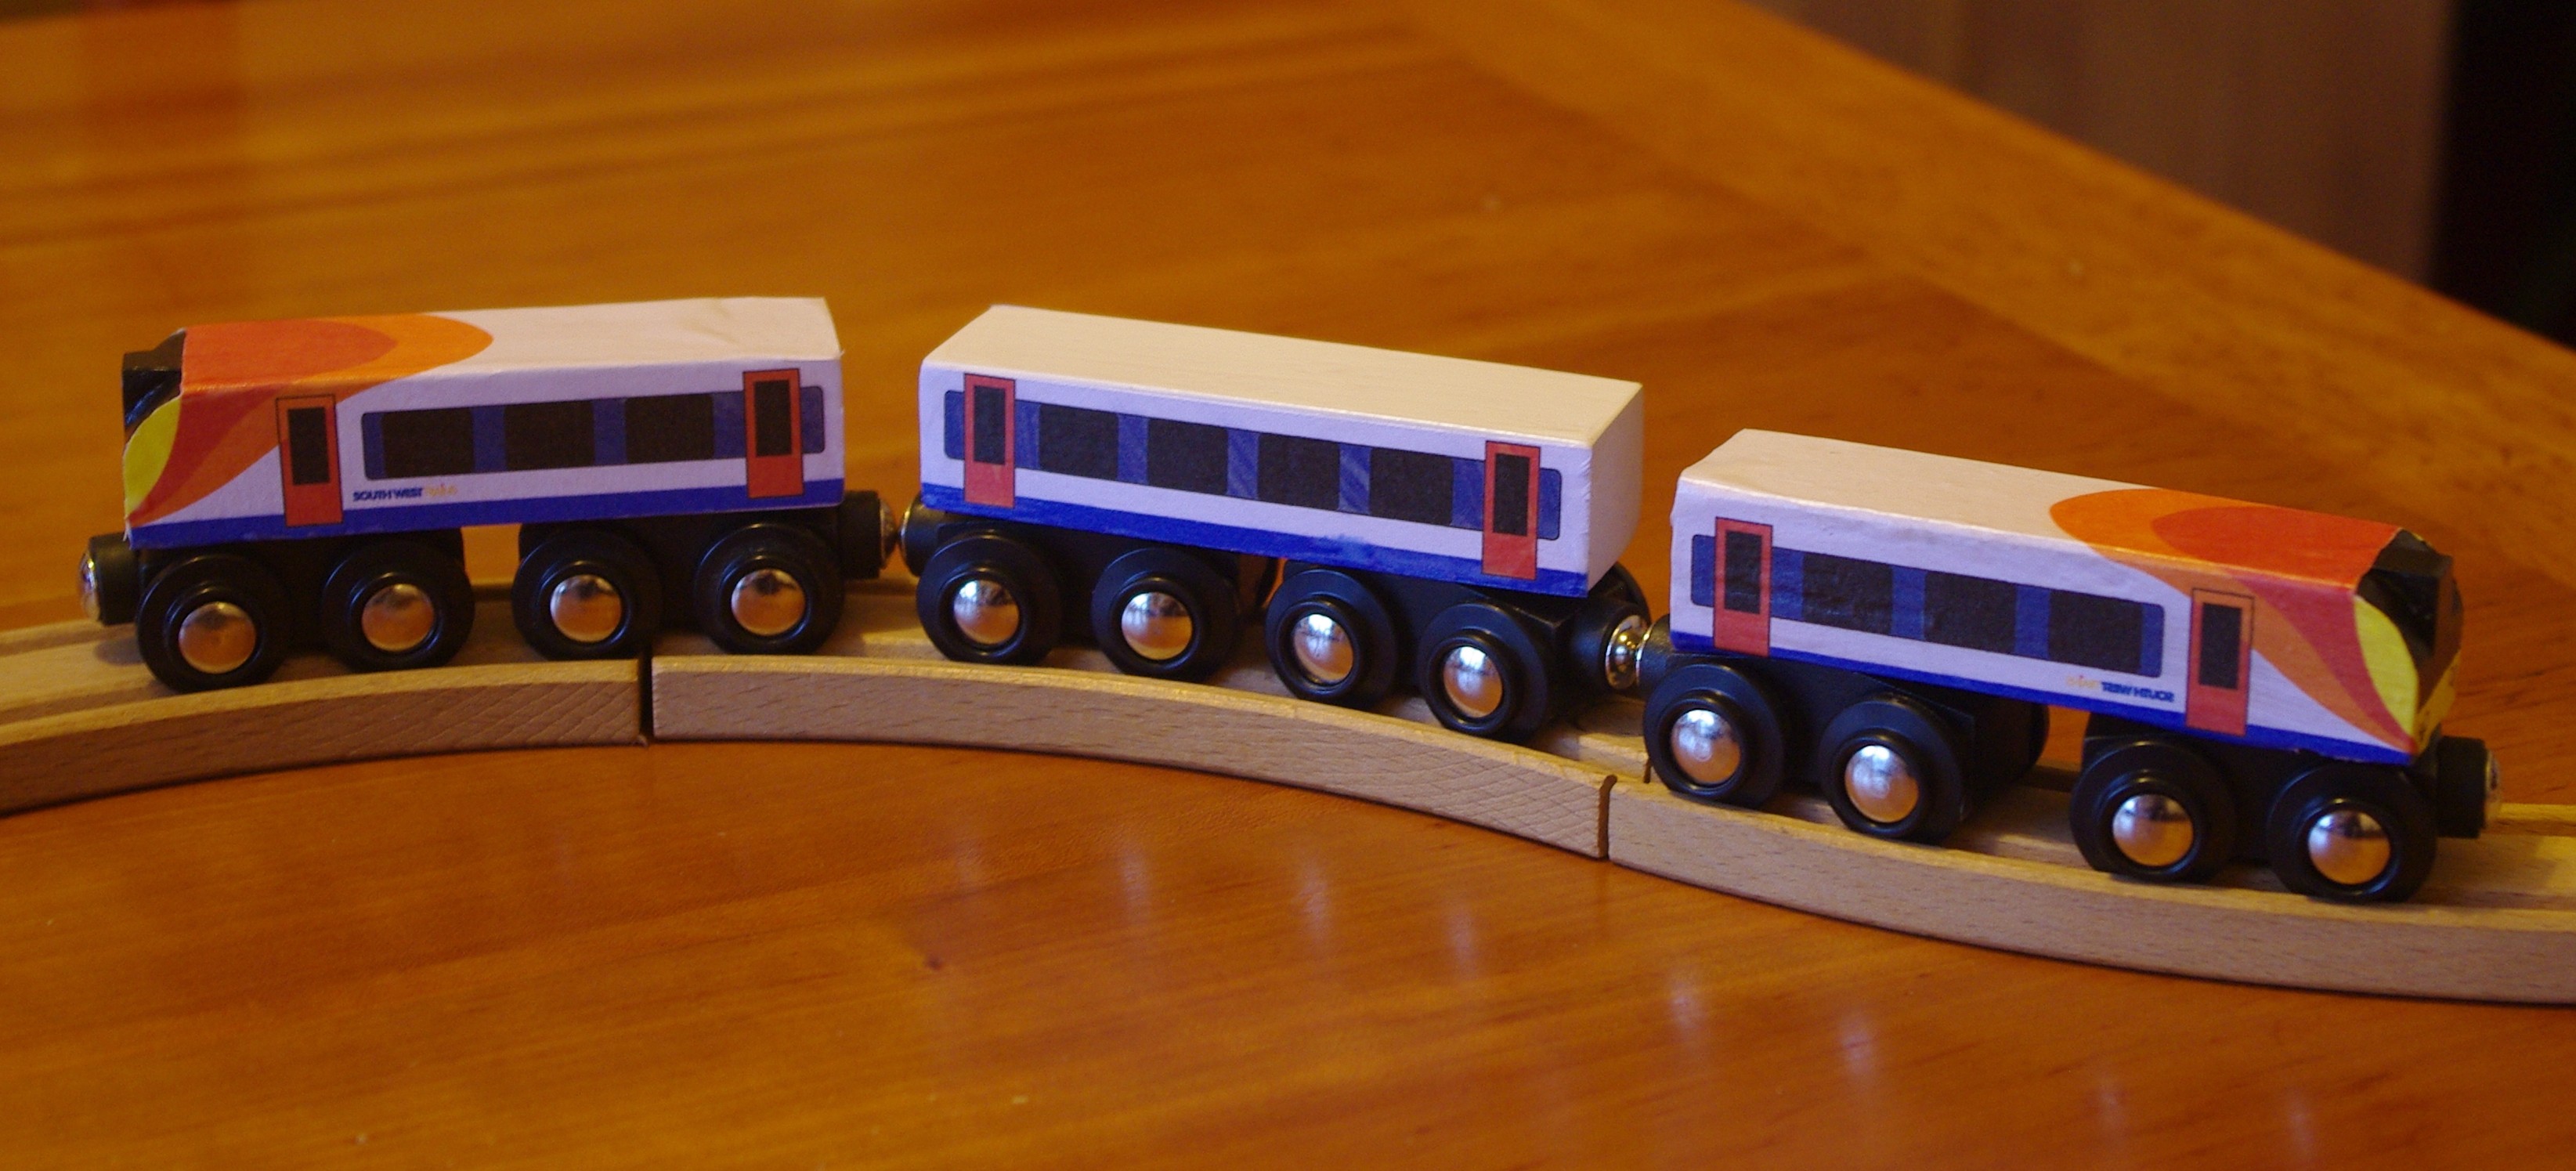
This is a writeup of how I made a custom toy South West Trains class 444 for my 2 year old niece. Or at least, a writeup of the bits I can remember.
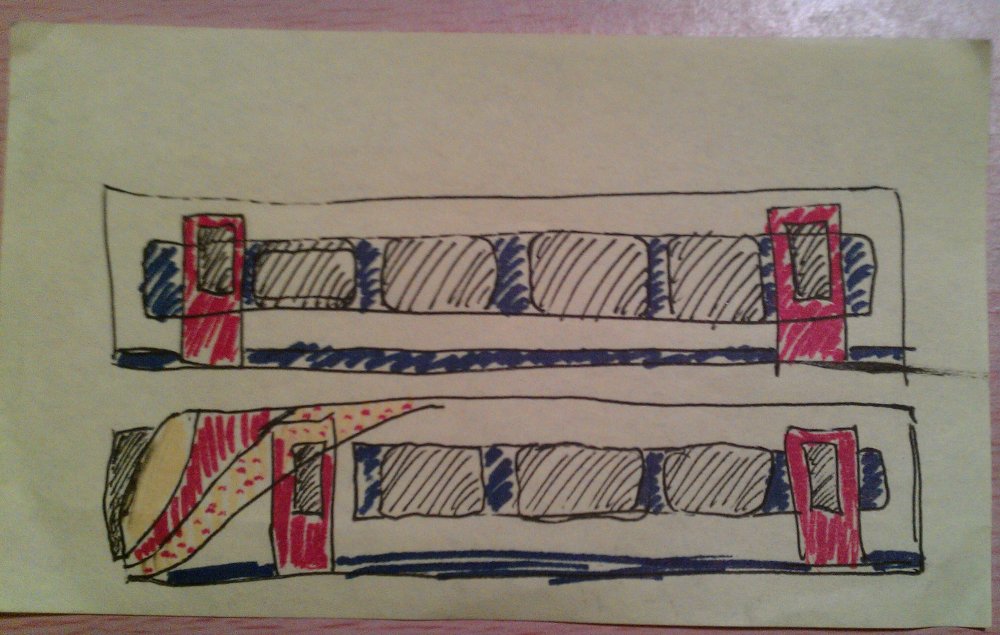
The first thing I did was lookup a photo of the relevant train (google images) and doodle a sort of caricature of it onto a post-it note one lunchtime at work. The gist was to simplify the look so that it would look reminiscent of the real thing but sufficiently “toy like” that it doesn’t look over detailed and fussy on a model only 11cm long.
For example – 10 windows becomes 4, or even 3 on the driving ends, the driver’s door vanishes, as do the corridor’s between coaches and lots of little outline details etc etc.
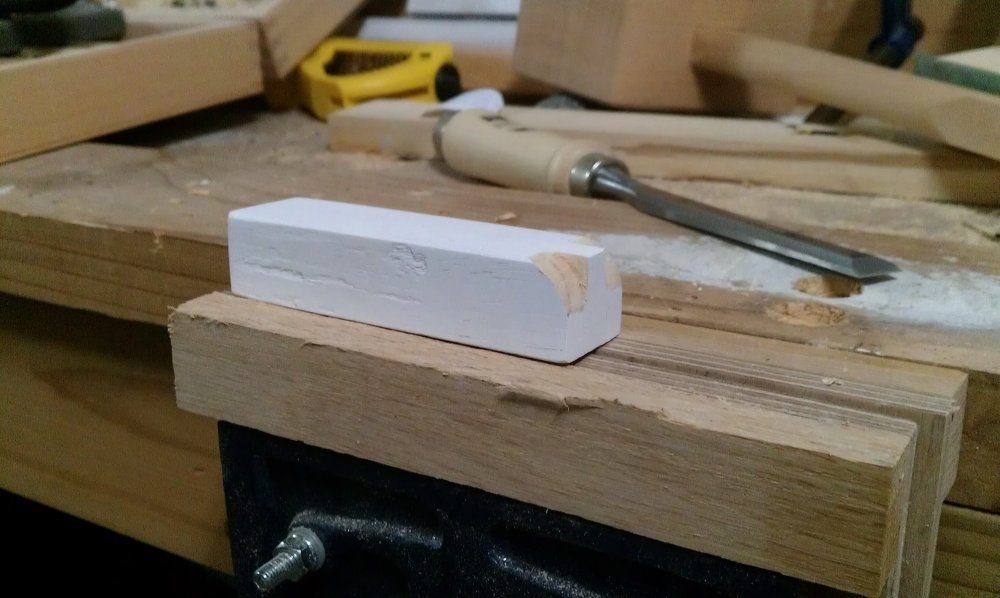
I formulated a plan to find an existing Brio compatible train, cannibalize the wheels and bogies, knock up a new wooden body, and join it all back together. Then I discovered that BigJigs sell a wagon that is simply a rectangular block already.
I bought six of these, sanded off all the paint, unscrewed the bogies and wheels, and sprayed them with a toy-safe aerosol white primer/undercoat. I then carved the ends into a simple approximation of the driving ends of the class 444 trains.
Next I learnt how to use Inkscape (this was actually a bit of a joy to learn and use) and drew up a design as an SVG. I drew the side view first, which I then extended to span the roof and opposite side. The full drawings are available to download from bitbucket here. They’re free for your own use, legal bit follows:
This work is licensed under the Creative Commons Attribution-NonCommercial-ShareAlike 4.0 International License. To view a copy of this license, visit http://creativecommons.org/licenses/by-nc-sa/4.0/.
The simplified side-only view is shown below.

The first attempt at getting the design from computer to toy was not successful. I read that you can use iron-on inkjet t-shirt transfers on wood. The short answer is you can’t. The longer answer is that when you heat it with an iron, the transfer melts and becomes very slimy and slippy, at which point it slips and smears all over the place. Your mileage may vary, but I gave up.
The second plan was to try getting some inkjet water-transfer paper. But because I was up against a deadline (Christmas) I ran out of time to order some off the internet. I’d still like to try this, but at the time I fell through to plan C.
My final attempt was simply to print the design out on paper, and glue it onto the model. I painted the ends black and yellow by hand. The end result actually looks OK. I then lacquered the whole thing with a toy-safe semi-gloss aerosol varnish/lacquer. When it was all dry, I simply screwed the bogies back on (making sure to check the magnetic couplings were in north/south matched pairs, and that the two driving cabs had the opposite polarity, so they would join together) and I was done.
A quick note on toy safety. There are lots of European standards on things like toxicity of paints, and more importantly – small parts that could be a choking hazard. This model probably doesn’t meet them, and you should treat these as novelty/models not toys for tiny children (at least not children so tiny that they still chew on everything they see). For toy safe paint and Varnish, check out the Painter’s craft range from Rust-Oleum (check the label to make sure, as not all Rust-Oleum products are safe). Or look for any paint that conforms to the EN-71 standard.
And that is how I arrived at the final result. Let me know if you like it, or if you try it for yourself.